
![]() For an introduction to what goes on in this column, click here.
For an introduction to what goes on in this column, click here.
I grew up in a family of Jewelry Guys. Guys like my grandfather. He wore dark, conservative suits to work; but at leisure, he treated each finger to a fat, gold ring and fastened thick ropes and chains of gold around his neck and wrists. The term “bling daddy” was not then in common usage, so my grandfather was described by Marv, his favorite jeweler, as being “a connoisseur of the finer men’s accessories.”
I inherited one of my grandfather’s signet rings. It’s a lump of solid gold with his initials engraved in a script so florid that it’s totally illegible. I never wear it. First, because my grandfather’s hands were so plump that this (a pinky ring) is too large to wear on my thumb. Second, it’s so heavy that if I hung it around my neck (as a friend suggested) I would be unable to stand upright.
I did not care for my grandfather’s aesthetic. He was, in my hotheaded teenaged opinion, far too shiny far too much of the time. What with the gold decorations, the rayon camp shirts, and the Brilliantine that glued his remaining hair to his skull, he sparkled like the top of the Chrysler Building at dawn. A bit much, I thought, for a quiet, middle-class life in the Detroit suburbs.
Then I grew to manhood. And though my own gold chains and charms (all childhood gifts from grandpa’s side of the family) sit untouched next to that enormous ring, I have discovered that I, the little bauble, have not fallen far from the gewgaw tree.
The only difference is where I put the decorations.
My weakness? Cuff links.
Oh, sweet sainted Harry Winston how I do love cuff links. My collection is ridiculous.

I wear them, yes. I but I don’t wear them absolutely every day; and even if I did, no person needs this many cuff links. It’s not as though they wear out frequently. And most cuffed shirts come with, you know, buttons. Buttons are far more convenient. Buttons are practical. Buttons make sense.
Yet I keep on buying cuff links.
The Perfect Motif
Not that I buy indiscriminately. Heavens, no. Aside from the potentially catastrophic drain on my bank balance, the most frustrating thing about the cuff link obsession is that modern jewelers assume men want links reflecting one of these lifestyles:
• golfing,
• horse racing,
• duck hunting,
• yachting,
• private aviation,
• high-stakes poker,
• drug trafficking.
These do not appeal to me, but the cuff link world tips heavily to designs incorporating golf tees, horseshoes, mallards, anchors, propellers, aces and spades, and huge weird agglomerations of colored rhinestones stuck in large chunks of all that glitters but is not gold.
No, thank you.
When I do find a set that expresses Who I Am as a Cuff Link Wearer, I snatch it right up. For example, florals. I love flowers. These anonymous Art Nouveau snowdrops were in a jar in a Seattle antiques mall. I got ’em for less than twenty bucks.

And these beanies? A gift, from a friend whose husband wore them for years on the bench as a judge. I may ask to be buried in them.
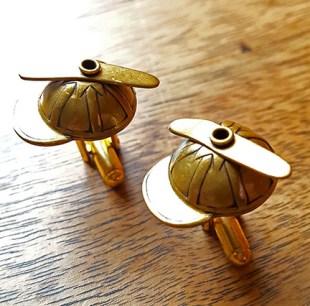
Those are propellers I can dig. (And they spin!)
Do It Yourself
I am delighted to find that some of the paraphernalia of traditional American and European menswear is making a comeback. There are burgeoning cuff link collectors groups, and groups for men who like suits, and what-have-you.
Most manufacturers have yet to catch up with the modern diversity of tastes, though. So it’s a relief and a pleasure to learn that if you have access to a supplier like Makers’ Mercantile, which carries the full line of Skacel Buttons, you can quite easily make handsome, fun cuff links that speak to those outside the horsie-duckie-boaty set.
There are many ways to go about making cufflinks from buttons. I’m going to show two in this column. Both methods are accessible to people who are not otherwise deeply into making jewelry, and who haven’t got any special jewelry-making equipment at home.
First, though, let’s have a look at a few buttons.
The Button Line-Up
Makers’ Mercantile’s button selection is famously rich; they carry all the lines of Skacel Buttons, as well as other fine makers. The materials are as varied as glass, antler, coconut, enamel, horn, plastic, shell, and wood.
For these cuff links, we want shank buttons–buttons which attach to fabric by integral loops on the back…

… rather than holes through the body of the button.
It took me hours, but I narrowed my choices to these:


Method One: Two-Button (Double-Sided) Links
Two-button links require, as the name suggests, two buttons for each cuff. They are double-sided, meaning the finished link is decorative on both sides. They are not only extra handsome, they’re also best for shank buttons whose shanks are difficult or impossible to remove.

To make them, you’ll need:
• four shank buttons, matching or coordinating
• two four-inch lengths of 18-gauge craft wire
• wire nippers
• needle nose pliers
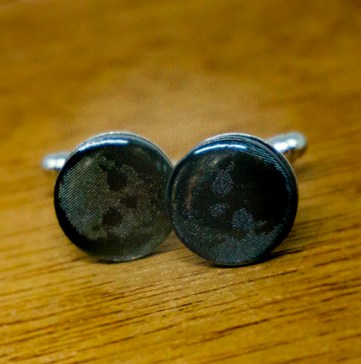
The buttons I chose for this method are from Skacel’s line of European glass. I could have ground or filed off the shanks (more about that in the next section), but there’s a risk of breakage. Also, I am deeply enamored of this design and wanted to multiply it by four.
Step 1. Slide the wire through the shank of the first button and, using the pliers, bend back half an inch of the wire.The first button is now loosely secured in place.
Note: 18-gauge wire is sturdy enough not to snap from normal use, but flexible enough that you won’t need brute strength to work with it. Most folks can easily bend and twist it with fingers, but pliers will make it easier to be precise.

Step 2. Slide the other end of the wire through the shank of the second button, until the button rests against the cut end of the first bend.

Step 3. Bend back the free end of the wire to loosely secure the second button.

Step 4. With the pliers, gently coil the free end of the wire around and around the length of wire connecting the buttons, starting just past the shank of the second button. Continue to coil until you reach the shank of the first button.

Step 5. With the nippers, snip off the remainder of the wire.
Step 6. With the pliers, press the cut end of the wire into the coil to secure.
And there you have a double-sided cufflink.

IMPORTANT NOTE. In this case, I am using four of the same button. But here’s a caveat: some buttons may be the right diameter to serve as links, but may also be too thick to easily fit through a ready-made buttonhole. That is, in fact, the case with these glass buttons.
Does it mean I can’t use these? Not at all. My preferred shirt brand is extra-generous with the buttonholes, so these will squeak through. But what I will likely do for ease of dressing is replace the second button with a smaller, coordinating button like this one, BR0971G14, which is 14mm rather than 18mm:

Then only the smaller button need pass through the holes. Combining a smaller button and a larger button looks perfectly fine, and does allow you (if you so desire) to use quite large and flashy buttons for the outside of your two-button link. That’s an especially fun way to dress up a plain blouse, by the way.
Method Two: Lever-Back Links
This is even simpler than method one. ‘

You will need:
• two buttons, matching or coordinating
• two good-quality cuff link blanks, available from Makers’ Mercantile
• a metal file or a motorized grinding tool
• a hot glue gun
• safety glasses or goggles
• a small vise (if using motorized grinder)
First, we want to get rid of the button shanks.
Before we do that, keep in mind that we’re dealing with metal. Bits of it tend to fly off as we work. This isn’t difficult, and it’s nothing to be scared of. However, reasonable safety precautions are vital. First, eye protection: safety goggles or safety glasses.

Second, do this only in area where you will not endanger others–keep pets, kids, nosy partners, etcetera, well away. A workshop, garage, or outdoor space is a best bet; and always do a thorough sweep/vacuum afterwards to remove all metal debris you create.
On all the metal-back buttons I selected, I was able to easily snip off the shanks…
…using a pair of standard, inexpensive wire nippers–easily procured from a hardware dealer, and likely already sitting in your toolbox if you have one.
Post clipping, all the buttons still had vestigial nubbins on the back.

To make a really nice set of links, we want to remove the nubbins and create a completely flat surface.
There are two options. The first works perfectly well, but takes a little longer. Use a metal file…

…and file away by hand until the nubbins are gone. It takes less time than you think.
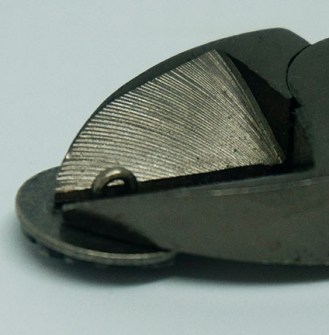
Or, if you have a little motorized helper like a Dremel, you can pop in a metal-grinding attachment (this is Dremel Head 8193)…

…and use it to grind off the nubs after you have placed the button securely in a vise…

…which I like to drape with a piece of scrap cloth or (better) a thin rubber pad to avoid scraping the finish on the public side of the button.

After grinding, give the button a minute to cool down completely before you take it out of the vise.
It should go without saying, but I’ll say it anyway: Do not ever attempt to grind the back of a button with a motorized tool while holding the button in your hand.
With the back of your buttons nice and smooth, fetch your cuff link blanks and your hot glue gun.

Apply a nice blob of hot glue to the pad on the blank, spreading it out a bit but keeping away from the edges…

…and immediately press it against the center back of the button.
The glue will set quickly, but let the piece sit and harden for a good 30 minutes before you try to put it on. If you find any stray “hairs” of glue showing, they’re easy to pick off before you give the link a final buff with a clean cloth.
Should you mess up, by the way–say, you don’t put the two surfaces together quite quickly enough and they won’t stick–it’s possible to pick off the dry glue and try again. Ask me how I know.
Cuff Link Giving Guide
In less than an hour, I found myself with multiple new, cute sets of cuff links–all of them slick enough for me to wear in a dressy setting. I can’t keep them all, sadly, so I’ve been thinking about who else might like to have them.
Zap! Splat!

Suited To: Comic Book Fans, Gamers, Superheroes, Illustrators, Stylish Street Fighters
Skulls
Suited To: Undertakers, Horror Fans, Bikers, Anatomy Professors, Goth Bankers, The Undead
Kitties

Suited To: Cat People, People with Cats, Cat Fanciers, Most Knitters You Will Ever Know, Veterinarians
Oak Leaf and Acorns

Suited To: Academics, Botanists, Lumberjacks, Tree Surgeons, Squirrels, Piglet
Next Time…
I put away the glue gun, roll up my sleeves, and try to figure out what to do when Makers’ Mercantile sends me this.

See you in two weeks.
Tools and Materials Appearing in This Issue
Glass Shiny Black Circling Flowers Buttons, 14 and 18 mm
Skacel Buttons Enamel Yin & Yang Cats, Black and White, 18mm
Skacel Buttons Enamel Skull, Black Gun Metal Shank, 15mm
Skacel Buttons Metal Acorn and Leaves, 15mm
Skacel Buttons Picture Comic Buttons, 18mm (shown in Zap! and Splat!; also available in Bang!, Bonk!, Kapow!, and Thwack!)
Cuff Link Blanks
About Franklin
Designer, teacher, author and illustrator Franklin Habit is the author of It Itches: A Stash of Knitting Cartoons (Interweave Press, 2008). His newest book, I Dream of Yarn: A Knit and Crochet Coloring Book was brought out by Soho Publishing in May 2016 and is in its second printing.
He travels constantly to teach knitters at shops and guilds across the country and internationally; and has been a popular member of the faculties of such festivals as Vogue Knitting Live!, STITCHES Events, the Maryland Sheep and Wool Festival, Squam Arts Workshops, the Taos Wool Festival, Sock Summit, and the Madrona Fiber Arts Winter Retreat.
Franklin’s varied experience in the fiber world includes contributions of writing and design to Vogue Knitting, Yarn Market News, Interweave Knits, Interweave Crochet, PieceWork, Twist Collective; and a regular columns and cartoons for Mason-Dixon Knitting, PLY Magazine, Lion Brand Yarns, and Skacel Collection/Makers’ Mercantile. Many of his independently published designs are available via Ravelry.com.
He is the longtime proprietor of The Panopticon, one of the most popular knitting blogs on the Internet (presently on hiatus).
Franklin lives in Chicago, Illinois, cohabiting shamelessly with 15,000 books, a Schacht spinning wheel, four looms, and a colony of yarn that multiplies whenever his back is turned.
Follow Franklin online via Twitter (@franklinhabit), Instagram (@franklin.habit), his Web site (franklinhabit.com) or his Facebook page.